
Creating a Simple Web Service and Client with JAX-WS
This section shows how to build and deploy a simple web service and client. The source code for the service is in
<INSTALL>/javaeetutorial5/examples/jaxws/helloservice/and the client is in<INSTALL>/javaeetutorial5/examples/jaxws/simpleclient/.Figure 15-1 illustrates how JAX-WS technology manages communication between a web service and client.
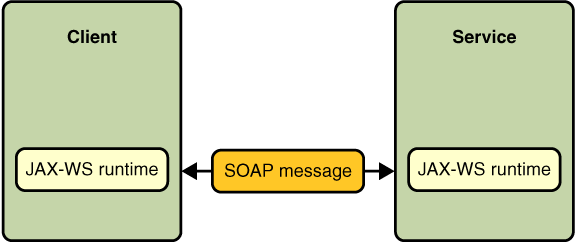
Figure 15-1 Communication Between a JAX-WS Web Service and a Client
The starting point for developing a JAX-WS web service is a Java class annotated with the
javax.jws.WebServiceannotation. TheWebServiceannotation defines the class as a web service endpoint.A service endpoint interface or service endpoint implementation (SEI) is a Java interface or class, respectively, that declares the methods that a client can invoke on the service. An interface is not required when building a JAX-WS endpoint. The web service implementation class implicitly defines a SEI.
You may specify an explicit interface by adding the
endpointInterfaceelement to theWebServiceannotation in the implementation class. You must then provide a interface that defines the public methods made available in the endpoint implementation class.You use the endpoint implementation class and the
wsgentool to generate the web service artifacts that connect a web service client to the JAX-WS runtime. For reference documentation onwsgen, see the Application Server man pages athttp://docs.sun.com/.Together, the
wsgentool and the Application Server provide the Application Server's implementation of JAX-WS.These are the basic steps for creating the web service and client:
- Code the implementation class.
- Compile the implementation class.
- Use
wsgento generate the artifacts required to deploy the service.- Package the files into a WAR file.
- Deploy the WAR file. The web service artifacts (which are used to communicate with clients) are generated by the Application Server during deployment.
- Code the client class.
- Use
wsimportto generate and compile the web service artifacts needed to connect to the service.- Compile the client class.
- Run the client.
The sections that follow cover these steps in greater detail.
Requirements of a JAX-WS Endpoint
JAX-WS endpoints must follow these requirements:
- The implementing class must be annotated with either the
javax.jws.WebServiceorjavax.jws.WebServiceProviderannotation.- The implementing class may explicitly reference an SEI through the
endpointInterfaceelement of the@WebServiceannotation, but is not required to do so. If no endpointInterface is not specified in@WebService, an SEI is implicitly defined for the implementing class.- The business methods of the implementing class must be public, and must not be declared
staticorfinal.- Business methods that are exposed to web service clients must be annotated with
javax.jws.WebMethod.- Business methods that are exposed to web service clients must have JAXB-compatible parameters and return types. See Default Data Type Bindings (page 512).
- The implementing class must not be declared
finaland must not beabstract.- The implementing class must have a default public constructor.
- The implementing class must not define the
finalizemethod.- The implementing class may use the
javax.annotation.PostConstructorjavax.annotation.PreDestroyannotations on its methods for lifecycle event callbacks.The
@PostConstructmethod is called by the container before the implementing class begins responding to web service clients.The
@PreDestroymethod is called by the container before the endpoint is removed from operation.Coding the Service Endpoint Implementation Class
In this example, the implementation class,
Hello, is annotated as a web service endpoint using the@WebServiceannotation.Hellodeclares a single method namedsayHello, annotated with the@WebMethodannotation.@WebMethodexposes the annotated method to web service clients.sayHelloreturns a greeting to the client, using the name passed tosayHelloto compose the greeting. The implementation class also must define a default, public, no-argument constructor.package helloservice.endpoint; import javax.jws.WebService; @WebService public class Hello { private String message = new String("Hello, "); public void Hello() {} @WebMethod public String sayHello(String name) { return message + name + "."; } }Building and Packaging the Service
To build and package
helloservice, in a terminal window go to the<INSTALL>/javaeetutorial5/examples/jaxws/helloservice/directory and type the following:This command calls the
defaulttarget, which builds and packages the application into an WAR file,helloservice.war, located in thedistdirectory.Deploying the Service
You deploy the service using
ant.Upon deployment, the Application Server and the JAX-WS runtime generate any additional artifacts required for web service invocation, including the WSDL file.
Deploying the Service
To deploy the
helloserviceexample, follow these steps:You can view the WSDL file of the deployed service by requesting the URL
http://localhost:8080/helloservice/hello?WSDLin a web browser. Now you are ready to create a client that accesses this service.Undeploying the Service
At this point in the tutorial, do not undeploy the service. When you are finished with this example, you can undeploy the service by typing this command:
The all Task
As a convenience, the
alltask will build, package, and deploy the application. To do this, enter the following command:Testing the Service Without a Client
The Application Server Admin Console allows you to test the methods of a web service endpoint. To test the
sayHellomethod ofHelloService, do the following:
- Open the Admin Console by opening the following URL in a web browser:
http://localhost:4848/- Enter the admin username and password to log in to the Admin Console.
- Click Web Services in the left pane of the Admin Console.
- Click
Hello.- Click Test.
- Under Methods, enter a name as the parameter to the
sayHellomethod.- Click the
sayHellobutton.This will take you to the
sayHelloMethod invocation page.- Under Method returned, you'll see the response from the endpoint.
A Simple JAX-WS Client
HelloClientis a stand-alone Java program that accesses thesayHellomethod ofHelloService. It makes this call through a port, a local object that acts as a proxy for the remote service. The port is created at development time by thewsimporttool, which generates JAX-WS portable artifacts based on a WSDL file.Coding the Client
When invoking the remote methods on the port, the client performs these steps:
- Uses the
javax.xml.ws.WebServiceRefannotation to declare a reference to a web service.WebServiceRefuses thewsdlLocationelement to specify the URI of the deployed service's WSDL file.
@WebServiceRef(wsdlLocation="http://localhost:8080/
    helloservice/hello?wsdl")
static HelloService service;- Retrieves a proxy to the service, also known as a port, by invoking
getHelloPorton the service.
Hello port = service.getHelloPort();The port implements the SEI defined by the service.
- Invokes the port's sayHello method, passing to the service a name.
String response = port.sayHello(name);Here's the full source of
HelloClient, located in the<INSTALL>/javaeetutorial5/examples/jaxws/simpleclient/src/javadirectory.package simpleclient;import javax.xml.ws.WebServiceRef; import helloservice.endpoint.HelloService; import helloservice.endpoint.Hello; public class HelloClient { @WebServiceRef(wsdlLocation="http://localhost:8080/ helloservice/hello?wsdl") static HelloService service; public static void main(String[] args) { try { HelloClient client = new HelloClient(); client.doTest(args); } catch(Exception e) { e.printStackTrace(); } } public void doTest(String[] args) { try { System.out.println("Retrieving the port from the following service: " + service); Hello port = service.getHelloPort(); System.out.println("Invoking the sayHello operation on the port."); String name; if (args.length > 0) { name = args[0]; } else { name = "No Name"; } String response = port.sayHello(name); System.out.println(response); } catch(Exception e) { e.printStackTrace(); } } }Building and Running the Client
To build the client, you must first have deployed
helloservice, as described in "Deploying the Service." Then navigate to<INSTALL>/examples/jaxws/simpleclient/and do the following:This command calls the
defaulttarget, which builds and packages the application into a JAR file,simpleclient.jar, located in thedistdirectory.The run the client, do the following:
All of the material in The Java™ EE 5 Tutorial is copyright-protected and may not be published in other works without express written permission from Sun Microsystems.