
What Is a JSP Page?
A JSP page is a text document that contains two types of text: static data, which can be expressed in any text-based format (such as HTML, SVG, WML, and XML), and JSP elements, which construct dynamic content.
The recommended file extension for the source file of a JSP page is
.jsp. The page can be composed of a top file that includes other files that contain either a complete JSP page or a fragment of a JSP page. The recommended extension for the source file of a fragment of a JSP page is.jspf.The JSP elements in a JSP page can be expressed in two syntaxes--standard and XML--though any given file can use only one syntax. A JSP page in XML syntax is an XML document and can be manipulated by tools and APIs for XML documents. This chapter and Chapters 6 through 8 document only the standard syntax. The XML syntax is covered in Chapter 5.
Example
The web page in Figure 4-1 is a form that allows you to select a locale and displays the date in a manner appropriate to the locale.
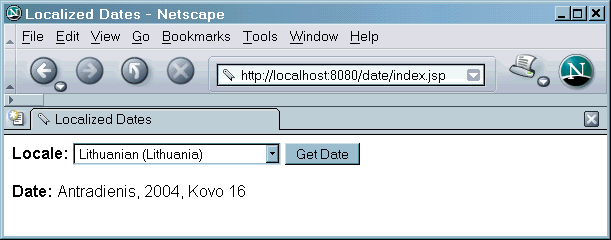
Figure 4-1 Localized Date Form
The source code for this example is in the
<INSTALL>/javaeetutorial5/examples/web/date/directory. The JSP page,index.jsp, used to create the form appears in a moment; it is a typical mixture of static HTML markup and JSP elements. If you have developed web pages, you are probably familiar with the HTML document structure statements (<head>,<body>, and so on) and the HTML statements that create a form (<form>)and a menu (<select>).The lines in bold in the example code contain the following types of JSP constructs:
- A page directive (
<%@page ... %>) sets the content type returned by the page.- Tag library directives (
<%@taglib ... %>) import custom tag libraries.jsp:useBeancreates an object containing a collection of locales and initializes an identifier that points to that object.- JSP expression language expressions (
${ }) retrieve the value of object properties. The values are used to set custom tag attribute values and create dynamic content.- Custom tags set a variable (
c:set), iterate over a collection of locale names (c:forEach), and conditionally insert HTML text into the response (c:if,c:choose,c:when,c:otherwise).jsp:setPropertysets the value of an object property.- A function (
f:equals) tests the equality of an attribute and the current item of a collection. (Note: A built-in==operator is usually used to test equality).Here is the JSP page:
<%@page contentType="text/html; charset=UTF-8" %> <%@tagliburi="http://java.sun.com/jsp/jstl/core" prefix="c" %> <%@tagliburi="/functions" prefix="f" %> <html> <head><title>Localized Dates</title></head> <body bgcolor="white"> <jsp:useBeanid="locales" scope="application" class="mypkg.MyLocales"/> <form name="localeForm" action="index.jsp" method="post"> <c:setvar="selectedLocaleString" value="${param.locale}" /> <c:setvar="selectedFlag" value="${!empty selectedLocaleString}" /> <b>Locale:</b> <select name=locale> <c:forEachvar="localeString" items="${locales.localeNames}" > <c:choose> <c:whentest="${selectedFlag}"> <c:choose> <c:whentest="${f:equals(selectedLocaleString, localeString)}" > <option selected>${localeString}</option> </c:when> <c:otherwise> <option>${localeString}</option> </c:otherwise> </c:choose> </c:when> <c:otherwise> <option>${localeString}</option> </c:otherwise> </c:choose> </c:forEach> </select> <input type="submit" name="Submit" value="Get Date"> </form> <c:iftest="${selectedFlag}" > <jsp:setPropertyname="locales" property="selectedLocaleString" value="${selectedLocaleString}" /> <jsp:useBeanid="date" class="mypkg.MyDate"/> <jsp:setPropertyname="date" property="locale" value="${locales.selectedLocale}"/> <b>Date: </b>${date.date}</c:if> </body> </html>. To build this example, perform the following steps:
- In a terminal window, go to
<INSTALL>/javaeetutorial5/examples/web/date/.- Run
ant. This target will spawn any necessary compilations and copy files to the<INSTALL>/javaeetutorial5/examples/web/date/build/directory. It will also package the files into a WAR file and copy this WAR file to the<INSTALL>/javaeetutorial5/examples/web/date/distdirectory.To deploy the example using
ant, follow these steps:To run the example, perform these steps:
You will see a combo box whose entries are locales. Select a locale and click Get Date. You will see the date expressed in a manner appropriate for that locale.
All of the material in The Java™ EE 5 Tutorial is copyright-protected and may not be published in other works without express written permission from Sun Microsystems.